
Removing the roller brush from the shark vacuum cleaner and cleaning it is essential. In fact, it should be done at least once a month or whenever you notice your vacuum under-performing.
Although modern vacuums have self-cleaning technology, manually cleaning their roller brush still pays good results. Thus, it would help a bunch if you learn beforehand the tips on how to remove roller brush from shark vacuum.
Roller brushes can be made of plastic, metal or wood. Whatever the case, the roller brush accumulates the most amount of dust and debris during cleaning. Second to motors, the roller brush is the busiest accessory in the Shark vacuum.
How do Dust & Debris Impede the Movement of the Roller Brush?
- Dirt/dust builds up within the bristles of the brush.
- The past dirt occupying a vast space in the brush makes it difficult for the brush to suck in more dust.
- The brush, due to the large amount of dirt inside it, finds it difficult to move or roll swiftly.
- Depending on the elements trapped in it– particularly hair, thread, etc.– the roller may eventually come to a stop.
From the scenarios presented, we now understand how important it is to clean the roller from Shark vacuum. But even before we start cleaning it, let us remove it first.
Here are fast and easy tips on how to remove roller brush from Shark vacuum…
Table of Contents
How to Remove Roller Brush from Shark Vacuum
- Keep it Safe; Disconnect the Shark Vacuum from Power Source
When people tell you that it is okay to remove the roller brush with the vacuum plugged, just don’t listen to them.
Consequently, the ease of roller brush access is indeed tempting. It makes you want to just grab it right there and then. The more you have all the reasons not to. However, you cannot simply pull it off without suffering a number or two of fatalities. That is one sure fact.
Several accidents in America almost always involve equipment. And, most of the afflictions (at least 60-70%) are caused by electrocution, severance by machine, and many more. All of which not only involve an equipment, but specifically a running equipment in that matter.
Always consider a plugged machine as an unpredictable beast. You would not want to entrust your life to it. So, unplug it for your safety.
You may also check Best Shark Vacuums for Hardwood Floors
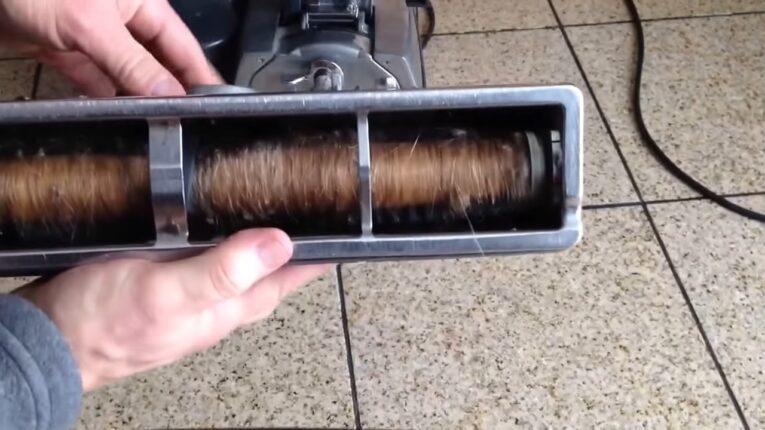
- Locate the Roller Brush
Almost all upright vacuums, particularly the Shark vacuum, have identical locations for their roller brush– the underside. Remembering the location of the roller brush for the next cleaning work speeds up the whole process.
To get a full view of the roller brush, turn the Shark vacuum down flat. You can easily access and unscrew the roller brush in this position.
- Loosen up its Screws
Before even loosening up its screws, count how many of them are in total. By having a concrete idea on the number of screws– including their sizes– you get to save a lot of time. Otherwise, you will have to delay the process midway just to look for the appropriate screwdrivers.
Fortunately for most Shark vacuum models, a repair kit (consisting of screwdrivers of assorted sizes) is included in its package. But in case you don’t find one, you can simply buy your own at the nearest handyman store. Just make sure that the screwdrivers fit the size of the screws.
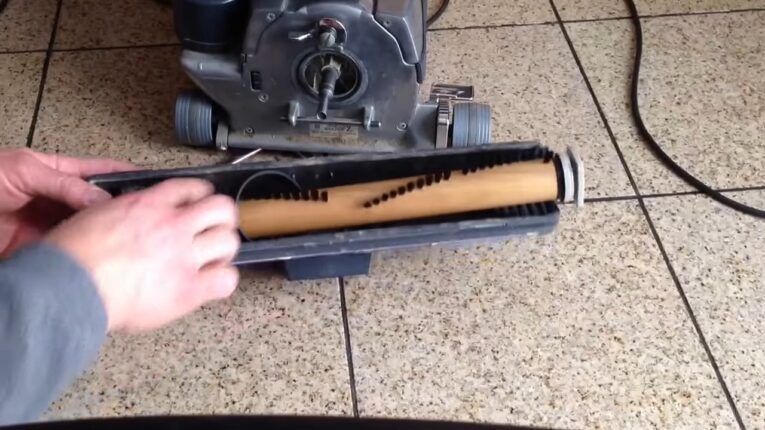
- Remove the Roller Brush
Now, you are good to go with the tips on how to remove roller brush from vacuum.
To remove the roller brush:
- Pop the roller’s belt out of the platform. Once the other side of the roller belt has protruded, proceed by easily pulling the other end off.
- When trying to pull the roller brush’s other end out, look out for attachments. It is important that you take it slow at this point. Attachments (nylon, thread, pop-up pins) in the roller brush are considered fragile, so you might have to be extra careful in handling them.
- If at this point, the roller brush is still hard to pop (this probably due to blocking accessories) try turning its roller to the opposite direction 4-5 times, or until it finally pops.
Trying to clean your roller brush? Here’s a quick guide.
Quick Guide on How to Clean Roller Brush
The two main reasons why you remove your roller brush from the Shark vacuum is either to replace or clean it.
Now, we focus on how to clean it.
- Assign a Place for Cleaning the Roller Brush; Cover it with Newspapers
Once you have successfully removed the roller brush from its platform, place it in the area you assigned for cleaning. Cover its whole area with newspaper for fast packing later.
Use any pointer or stick to pull out trapped hair and dirt in the brush. Use scissors to cut dense strands, releasing them for easy cleaning.
Use a brush this time to dust off accumulated dirt on both sides of the roller brush.
- Unfasten the Side Caps
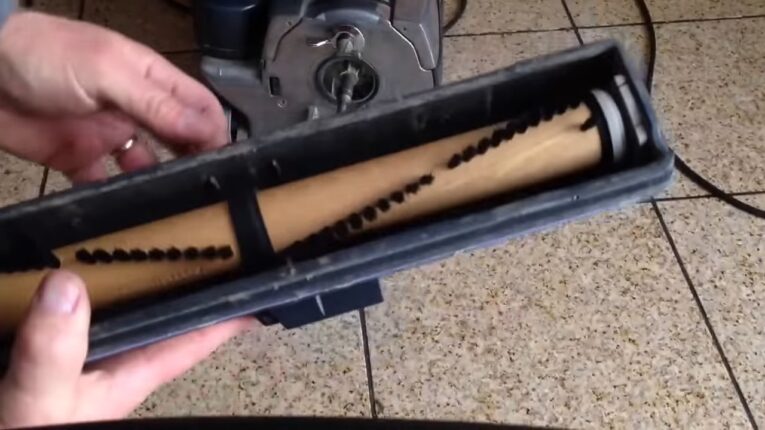
For a 100% clean turnabout, loosen up the side caps located on both ends of the roller brush. Just be careful in doing so.
Once you loosen them up, the innermost part of the brush should pop up. Here, you will bristle apart from each other. Take this opportunity to go through the crevices of the brush.
Spend time in cleaning this area to truly free it from trapped dirt and dust. Don’t forget to also clean the inside of the housing. If you plan to clean the housing with water, that would be fine as long you dry it properly before returning it in place.
- Return the Roller Brush to its Place
If you think you have done enough for the day, then it is time to reattach the roller brush to its platform and experience the Shark vacuum improvement for yourself.
Fit the roller brush back to the platform of the vacuum. For easy entry, pull one side of the belt to slide the roller brush back in.
But before you secure the platform plate back in, check out the belt. Does it need replacement? If it does, then replace it. If not, then proceed for the final securement.
Slide the first end of the brush to the platform slot, then the opposite side. If you hear a snap then the slot is secure.
Put back the screws and tighten up all necessary attachments.
Turn the Shark vacuum on and let it run for the first 5 minutes. Observe improvements in its performance.
Frequently Asked Questions About Roller Brush in Shark Vacuum
Why is the shark navigator brush not spinning properly?
The most immediate reason why the roller brush in the Shark vacuum is not spinning properly is because it is full of dirt. Another possible reason is that the roller is actually broken and needs replacement.
Is it safe to remove the roller brush from the Shark Vacuum?
Yes. It should be safe to remove the roller brush from the vacuum as long as the procedures are properly observed.
What does the roller brush do in the vacuum?
The roller brush acts as a broom and/or brush to clear the surface for the vacuum’s efficient suctioning.
Can I replace the roller brush?
Yes. You absolutely can.
Conclusion
It is therefore essential to remove and clean the roller brush from the Shark vacuum time by time. Anyhow, replacing it still deems removing it from its place.
It is fairly easy to remove the roller brush from the vacuum. But it would be easier and safer if proper procedure on how to remove roller brush from shark vacuum is observed. The process in doing so can be more detailed than you think. Thus, preparing sufficient tools accounts to a faster process, least successful.