

The floor, among the most common parts of the boat, is proven to be most exposed to rotting. For one, it absorbs all water, sea breeze, and other elements in. Boat floors, more than the passengers, surely go through tough times in the seas. Thus, removing and replacing a boat floor is expected every once in a while. Some say it’s difficult to do; others say it only takes a few minutes of your time. Our answer: this article.
The steps on how to replace the boat floor don’t really require massive effort. These steps, all 5 of them, only take 1-2 persons to do them and a few tools. How did we know? We approached a ton of experts and of course, we did some few efforts ourselves.
The result: it wasn’t that hard. Most of the time, it simply felt like replacing any floor tiles in your home. In fact, the only serious possibility that we are to take issue with is a rotten floor. However, this hasn’t really become a problem nowadays, especially with the presence of advanced floorwork solutions. So, you might as well consider ticking that box off your list.
If you read this article to its last detail, you will learn the following points:
- Why replace a boat floor
- When and how to replace boat floor
- Materials and tools to prepare before replacing a boat floor
- And many more
The boat’s docked. Let’s get to work!

Table of Contents
When Should I Replace Boat Floor?
You should replace your boat floor when certain factors begin manifesting in the floor quality.
The following factors should compel you to replace your boat floor:
- Dark water stains begin appearing along the floor tile frames.
- Some parts of the floor become too soft/spongy to tread on.
- Extreme molds, algae, and other slippery stuff begin infecting the surface of the floor tile.
- Cleaning no longer does any good to the floor tiles.
- The floor is about to give way or collapse.
- Cracks tend to be too hard to fill.
- Floor appears extremely worn.
- Floor almost tears into two.
If you notice these signs appearing, don’t delay. Act on it fast!
How Do I Replace Boat Floor?
You can easily remove and replace the boat floor by following the 5 steps we are presenting below.
But even before you begin with step one, you’ll have to gather these important materials and tools to ensure its success!
The tools are as follows:
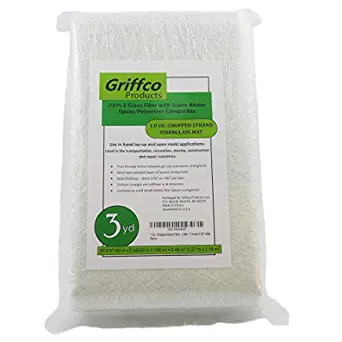
- Fiberglass strand (Click the link here to see our top-reviewed fiberglass strand product)
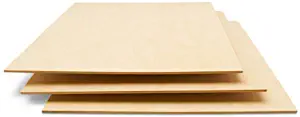
- Boat Floor Replacement Plywood (Click the link here to see our top plywood product)
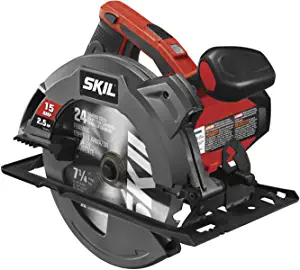
- Power drill (Click the link here to see our top power drill)


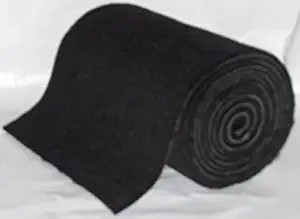
- External floor layer (carpets, rugs, etc.) (Click here to view our recommended product/s)


If you’re ready with your tools, then let’s get going!
Simple Steps on How to Replace Boat Floor
Here are the steps on how to replace boat floor:
Step #1. Clear the area of the floor you want replaced.
- Check for fixed seats, decors, wiring, and other elements that could interfere in the removal of the floor tiles.
- Remove or detach these attachments to clear the floor area.
- Make sure that the floor area in the deck is dry.
Step #2. Remove the existing flooring.
- Begin removing the old flooring.
- Leave at least a 3-4-inch allowance on the frame aligning the edge of the boat. This should make it easy and safe to replace boat floor.
- When removing a soft and spongy boat floor, avoid holding it in the middle as it can cause the floor tile to crack. Instead, hold it from the tip of the tile.
Step #3. Reconstruct the new floor.
- To replace boat floor, prepare the all-new plywood for measuring.
- Using the old floor tiles as a model, measure and cut the plywoods (if needed) to fit into the existing frame.
- Fix holes for screwing into the wood floor tiles.
- Once done, coat the wood tiles with epoxy to water-proof them.
- With the frame and screws all set, attach/lay the flooring. Add new holes if necessary.
Step #4. Seal the floor area.
- Once reconstructed, finish the floor with the fiberglass strand.
- Pour in resin after and then spread.
- Once the sealed new floor has dried, sand it to polish.
- Create new holes aligning the seal (resin) and the floor tile.
- Screw the sealed floor tiles into the deck.
Step #5. Layer in a carpet or any external pads.
- With the new floor screwed, lay in any carpet or external padding for added protection.
- For the final part of your boat floor replacement: re-fix the seats, tools, and other materials into place.
Congratulations — you’ve reached this far. You can replace the boat floor anytime and expect success.
Meanwhile, scroll down to hear our conclusion.
You may also like to read How to Remove Candle Wax from Wooden Floor
Conclusion
So how difficult is it to remove and replace boat floor? From our experience, it was relatively easy. The only challenge lies with having to deal with an extremely rotten wood floor. In some cases, this can prove too challenging that some people recommend asking the help of an expert.
The solution: do not wait for the floor to totally rot out to replace it. Look out for signs like dark water stains, extreme molds and algae, softening, and tearing and wearing. Now, unless your boat is not a massive ship, you’re good to go with our simple steps on how to remove the boat floor.
The 5 simple steps include: (1) clear the area, (2) remove the existing flooring, (3) reconstruct the new floor, (4) seal the floor, and (5) add carpet and other layers.
Best of luck on your efforts, mate!